Tuesday, December 16, 2014

December Update: House Exterior Punch List

The husband and I used to really enjoy doing yard work so it seemed logical to dive into the thing we liked the most to get our feet wet on this house.  Given the sheer amount of holes/cracks/popcorn/paneling issues with the walls inside, painting seemed super overwhelming.  Every season I would plant almost 200 annuals in our flower beds, we were on top of mowing/weeds, I would trim our little oak tree like a boss....just generally we took pride in our house appearance.  We don't have an HOA in our neighborhood so maybe that's a lot of why we haven't tried enough...or it could be the rocks finally broke our spirit.

When we last left off on the pond adventure we had completely torn it out and filled the hole with 20 bags of soil.  Then we declared it too hot to do anything else and quit for about a month and a half.    Then one day it suddenly got a little cooler, we got some pep in our yard step and got the brilliant idea to keep going for about 3-4 more weekends.

Here's the running list of action items for the exterior:

Gutters on house and workshop
Tear out pond
Remove all the rocks - 60% complete
Remove fake gutters around workshop & fill in with soil - 33% complete
Tear our bricks in front yard plant beds
Landscape front beds
Trim oak tree in front yard
Tear out pond electrical
Tear out little tree next to pond electrical
Replace fence & bring one side towards street for more backyard
Tear out melon plants/lattice on side yard
Tear out lattice/vine plants in back yard
Lay sod on side yard & back yard
Run new sprinklers where pond was and tune up existing (too much overspray onto fence)
Paint front door
Power wash front porch
Replace numbers on house with something more modern
Replace front door light fixture with something more modern
Possibly tear out some concrete in front yard (long term)
Add some flair to house facade (long term)
Install horseshoe pits in backyard (this requires not being hermits)
Replace brown roof for "weathered wood" shingles (standard roof color - crossing fingers for hail - long term)

Looking at that list...it's a lot of projects.  Some are contractor jobs that we just haven't handled or it's the wrong season (laying sod).  Either way, the current state of the backyard is way better looking than it used to be.  My parents came up for Thanksgiving and we actually had a nice little spot to sit outside and get a fire going in our chiminea.  The front yard is also looking better but with a sea of concrete, it is really tough to have curb appeal.  I think we need some colorful ceramic planters by the front door and our roof line is also very flat which doesn't help with visual interest.

Stay tuned for an update on how the backyard is looking and why this blue tub of rocks is STILL in the way for four months and counting...


Monday, December 15, 2014

Nest Energy Report: November

We've had the Nest thermostat for almost six months now and my opinion of it hasn't changed since my last post.  Mine is tucked in the hallway with the guest rooms and we never walk by it so it thinks we are never home and tries to adjust to reflect the "absence".  We turned off the learning/sensing features and manage it manually now.  I find this to be frustrating for how "smart" it is but oh well!

So for November (let's just skip over the other months) we mostly used the heater.  We keep our temperature settings lower because despite the fact that our system is 20 years old, it surprisingly works well.  Nest has three options for cooling/heating.  It has A/C, heat and a mix of A/C and heat.  November was cold so we did 100% heat.  December has been much milder and we have been using the mix setting the past two weeks.

How did we do?  We keep our heat temp around 69-70*.  If it's really cold, we will bump it up to 72* but then go to sleep with it around 69/70.  For November we used 56 hours of energy and according to the weekly report we get from Reliant, we average about $3.50/day in electric usage.  Nest's suggestion this month was to turn our temperature down another 2 degrees but that's our max cold tolerance so maybe not.

Anyway, a month or so ago I did turn off the "auto away" feature on Nest because of the hall issue and it thinking we are gone all the time.  Turning that off killed my leafs so usually we earn a leaf a day and instead ended up with 5 for the month.  The leafs used to be a game for me - see how energy efficient I could be...but now I am more interested in how long the system runs.  On heat, it usually will run for maybe 45 minutes the entire day.  My favorite thing is still being able to control it from my iPhone!!

Here is a snapshot from our report...have you taken the plunge with the Nest yet?


Sunday, December 14, 2014

Hello....anyone there?

Sooo....it's been several months since I got on here and it appears I have lost my audience...all 4 of you!  But Christmas cards are going out this week and if people look at the back side of the card, they will see our blog address.  I actually enjoyed blogging and I recognize I will never become a millionaire off this but it has been tough trying to find my "niche".

Truthfully we are pretty boring (my friend described us as hermits the other day which is completely true) so the only thing we really had to write about was our home projects.  When we started getting into the rock situation in the backyard and had no where to dump them, we completely ran out of steam.  Our backyard looks like it's about 40% complete and we still need to hit up the entry way with a 3rd coat of paint to make it look more even.  I've got 5 cans of paint in the laundry room waiting to go up on walls.  Admittedly, living in a house that is outdated and like Pandora's box when you get into simple projects is very very overwhelming.  We are at a point where we need to get a contractor to come in here to tell us what the overall scope is going to be and how to break this up into phases.  We constantly go around in circles about ideas for the larger projects like the kitchen and master bathroom/closet and obsessing about things we are not willing to throw money at (or have any idea of cost) is getting exhausting!

Oddly enough the thing we need first and foremost are gutters.  One would not expect to need them out in an area that averages 15 inches of rain a year, but when you drive around and look at houses that don't have them (which is the majority), the rain is eroding away the bottom half of the brick veneer when it falls off the roof and splashes.  Our house is 30ish years old and a significant amount of our bricks are very fragile and chip off if you brush up on them.  We also have issues with the rain trenching a "moat" around our house, there's no diversion over doorways and our front bed planter is ground zero for plant pummeling when it rains.  We got new gutters at our old house thanks to a terrible hail storm and I think replacing all of them and the downspouts was about $1500.  Everything in Midland is twice as expensive and twice as slow but we definitely need to look into this project.

Number two (this and gutters is a toss up, really) on the priority list is a whole house water softener and a R.O. system in the kitchen.  The water out here is....not good.  It is undrinkable (very salty and has a dirty, thick mouth feel) and it constantly fails federal regulations on things like particulates, toxins, etc.  Nice, huh?  The water is heavy with chlorine and my skin has never been worse since moving out here.  When we bought our refrigerator we had to get a plumber to re-plum the water line to the fridge area so we got an estimate on what we need.  It will be about four thousand dollars (yikes) to get everything installed.  Our dishes come out clean but not streak free, my skin might be happy and my hair might look good, our appliances will last longer and we also will not have to go once every 1.5 weeks or so to refill our 5 gallon water jugs at the RO water stations.  That isn't a big deal at all to me and Sky likes to go, but getting a RO tap installed at the sink will be nice!

So those are some of things we are eyeing pulling the trigger on.  We have been going through a ton of transition and loss over the past year so I am ready for 2015 to be here so we can start fresh.  I also am going to work on blog content so I do not ignore my little space on the interwebs anymore!

Wednesday, September 10, 2014

August Nest Energy Report

I know I am being a bad blogger lately but with no DIY projects, it's just the day to day boring stuff like work and school.  Maybe I will do a "Day in the Life" post because I enjoy those on other blogs.

I got my August Nest Report today and I still can't explain how the Nest is doing anything productive/smart for the house.  For August we cooled our house for 317 hours - that is about 100 hours more than July.  Granted it has been super hot out here and August is always a peak usage month but that's a significant jump even with the "Auto Away" feature.  The only thing I have done differently is I bumped the temp down to 74* at noon on Fridays.  I have half days and when I come home it is pretty warm inside.  Maybe I will turn it back up and try to stick with fans only.

Another thing Nest did was tell me how many leafs I earned - we pretty much earn a leaf a day due to "Auto Away".  On average we probably use about 11 hours of AC a day.  This weekend it rained off and on steadily every day and we only used 3 and 4 hours of AC on Saturday and Sunday.  That was pretty awesome.  Apparently we are awesome leaf earners so that is motivating in the game of "use less energy".  Not sure how much motivation I have while it's still super hot outside but we definitely do not keep the house very warm in the winter.

This weekend we are hoping to finally make the push and get the rocks out of the back yard.  I would also like to change out a few lights on the exterior of the house - everything is motion sense and they don't work well because someone shot out the sensors with a BB gun so we would like on/off fixtures.


Friday, September 5, 2014

Cooking Steak in an Ice Chest

Sous-vide is a method of cooking food sealed in airtight plastic bags in a water bath or in a temperature-controlled steam environment for longer than normal cooking times—72 hours in some cases—at an accurately regulated temperature much lower than normally used for cooking, typically around 131°F to 140°F for meats and higher for vegetables. The intention is to cook the item evenly, ensuring that the inside is properly cooked without overcooking the outside, and retain moisture.  {from wikipedia}

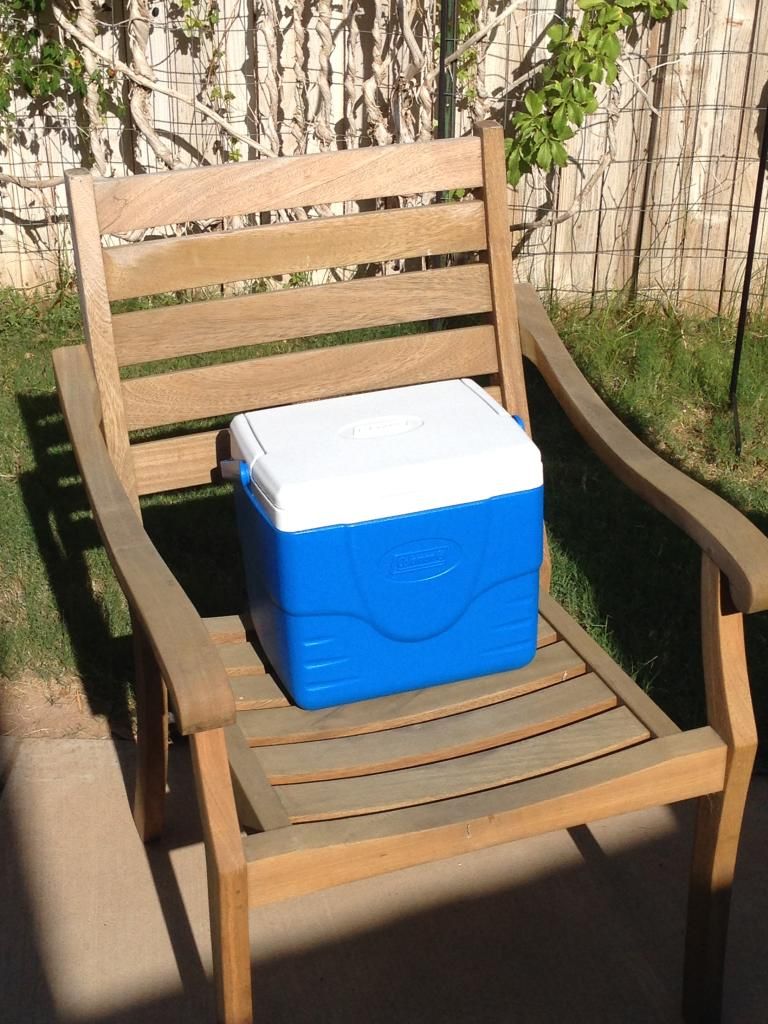
You can buy sous-vide cooking tools - this one from William-Sonoma will run you about $500.  You can also buy what is essentially a water heater and use your own container - this one will empty your wallet by $1,000.  Or you can be cheap and use an ice chest like we did!

This video is super simple and explains how you can cook a steak in an ice chest.  We practiced the day before with a thermometer to watch how the temperature fluctuates and added hot water as necessary.  I was really skeptical about whether this would work but I trusted the process and the husband.  This truly was the best steak I have ever had and we have spent over $900 for a luxury steak house experience at Wolfgang Puck's Cut in Las Vegas (which was also pretty awesome).

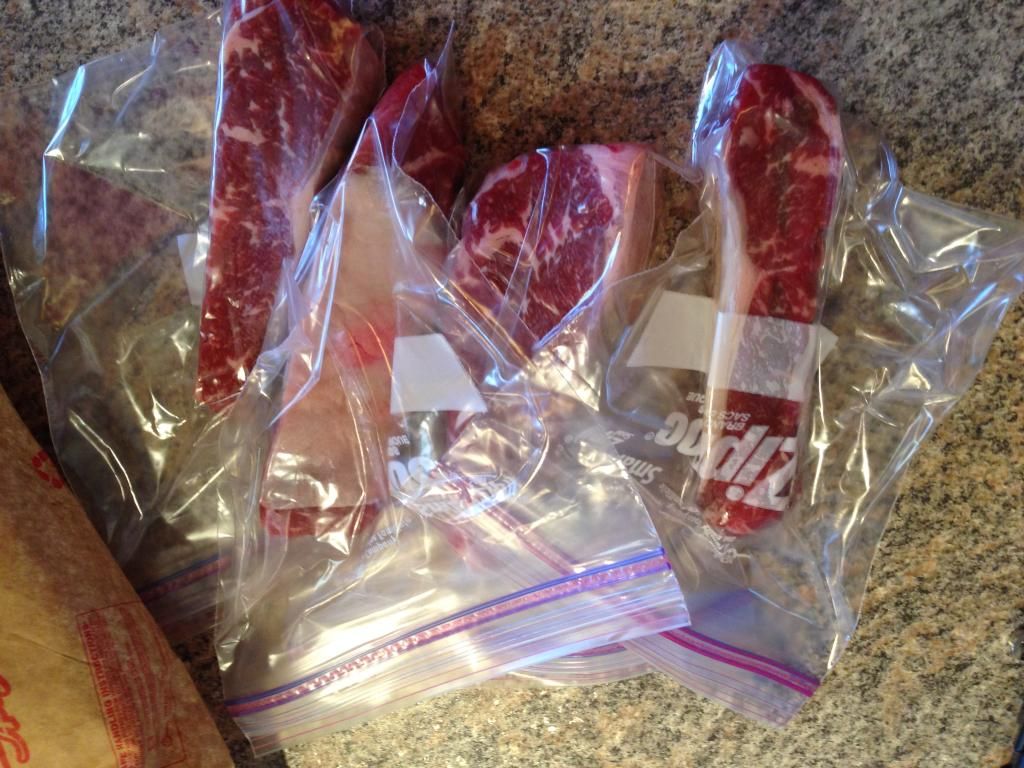
STEP 1.  Buy your steak (duh).  You do not have to use expensive steaks because this cooking process is low and slow.  We splurged on HEB 31 day dry aged ribeyes since it was Labor Day weekend.  Before you are ready to cook the steaks, get them as close to room temperature as possible.  You want room temperature because when you submerge them in the water, you want to maintain the water temperature and the initial drop off is the fastest.

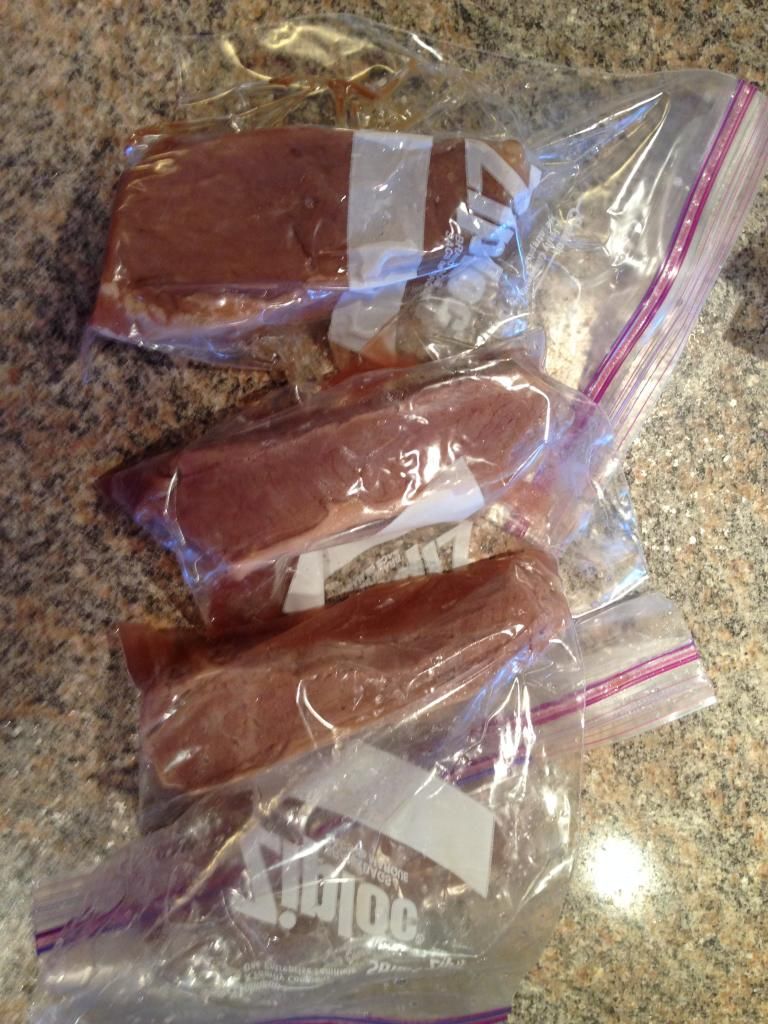
STEP 2.  Our target temperature for the steaks was 134*F which meant our water needed to be around 138*F.  Boil your water, pour it in the cooler and check the temperature.  Make sure it is a few degrees warmer than you want to account for thermal loss.  When it is at your desired temperature, seal each steak into a ziplock with the air squeezed out or a vacuum sealed bag (if you have that).  Do not season the meat.


STEP 3.  Water temperature management.  Once you drop your steaks in, close the lid and set the timer for 5 minutes.  Check the water temperature and add water if necessary - we had to add two cups of boiling water.  Repeat at 10 or 15 minute intervals until you reach the desired time and level of doneness to the meat.  We cooked our steaks for 45 minutes at a target meat temp of 134*.  The water temperature inside the cooler dictates the temperature that your meat will hit - it won't go over that temperature so you can't overcook your meat with this method.

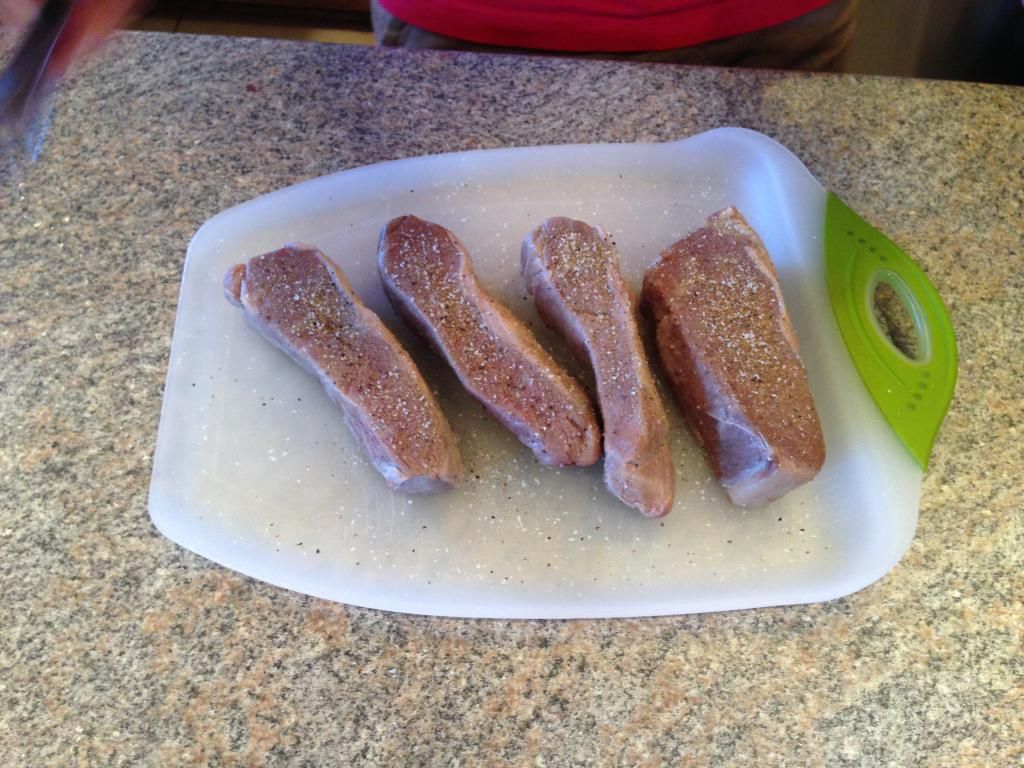
STEP 4.  Remove the steaks from the cooler.  Discard the plastic bags and pat the steaks dry.  The meat will look sad and not appetizing at all so you will want to sear the outsides and season the meat. Get your grill/cast iron skillet screaming hot.  We put butter on our griddle and seasoned the meat with salt/garlic powder/pepper.  Sear on each side of the steak for about a minute per side - a little longer if you like it crispier.  Remove once you are done searing.


gimme all the steaks!!!!!!
STEP 5.  Enjoy!  The meat is so tender and it has a different mouth feel to it - it is so moist that we thought it tasted super juicy and almost like the consistency of ahi tuna.  I will always like grilled steaks or cast iron skillet steaks but cooking a steak with a sous-vide method has totally changed my outlook on how an awesome steak tastes.  The only comment was the husband thought his was a teensy bit rare so we might go up a few degrees next time.

Tuesday, September 2, 2014

Recipe {Homemade Chili/Taco Seasoning}

I stumbled on this recipe one day because I was tired of taco and chili seasoning packets.  They are so high in sodium (and chemicals) and I wasn't finding a brand that had the taste I was looking for.  Tacos are our go-to lazy dinner and when it's cold we love to make chili.  After some quick googling I ended up on mybakingaddiction.com and found this little gem.  It is completely customizable and as it is, it is not too spicy but that doesn't mean you can't turn it up a notch!

This yields about 2/3 cup of seasoning and it stores great.

Ingredients
4 tablespoons chili powder
1 teaspoon garlic powder
1 teaspoon onion powder
1 teaspoon crushed red pepper flakes (I like 2 teaspoons)
1/4 teaspoon cayenne pepper
1 teaspoon dried oregano
2 teaspoons paprika (I like smoked paprika)
2 tablespoons ground cumin
3 teaspoons sea salt (I do not put salt in my mix)
4 teaspoons black pepper (sometimes I omit this and do it to taste)

Combine in a medium bowl and mix all ingredients together.  Store in an air tight container at room temperature.  I use 2.5 to 3 tablespoons for each dish.  I believe this yields about 5-7 dishes worth of servings.


Monday, September 1, 2014

Paint Recommendations {Sherwin Williams}

Three years ago when we decided to start repainting our house we went to Sherwin Williams and bought a paint fan for $20.  If we kept the receipt and were done using it, the guy at the store said we could bring it back and get a partial refund.

When we bought our Little Elm house the paint colors were okay - they weren't necessarily our taste but it was move-in ready and that was what we were looking for.  Fast forward to moving in....and we notice all of these discolored spots everywhere with drips.  The owners decided to "help" by touching up the paint where they had nail holes.  They even went so far as to cut chunks of the drywall out behind the doors to try to color match the walls.  If we buy a house again that has move-in ready colors that we can live with for a little - we will write it into the contract that the seller is not to touch the walls - just take your things off the walls and leave them ALONE!  

We lived with it for a little while and finally found a painter to do the front half of our house.  He was nice enough but I would never use him again.  He recommended flat paint and we liked the idea of flat because the semi-gloss shine didn't need to be on all the walls in the house.  Aside from the crappy paint job he did, he picked SW colors and paint types.  Enter the ProMar series from Sherwin Williams.
This is hands down the crappiest paint I have ever paid for in my life.  We were sold on flat paint because it was "washable".  If any contractor comes to your house with ProMar cans - chase him away and tell him to buy something else!  Our second contractor showed up with this stuff after I specifically ordered something superior and he got an earful.  Here is why I don't like this paint and I would never recommend it.  ProMar 200 (or any ProMar series) is a contractor grade paint that is flat and goes on with a chalky-like feel to the touch.  It also is NOT washable.  We scratched the wall when a lamp fell over so I was trying to wipe the scratch with a damp cloth.  If the paint touches water it will discolor and rubbing it will cause the paint to rub off and expose whatever was underneath.  The only pro to this paint is that it does touch up fairly well (if you have a can still on hand) and feathers nicely but not having the ability to scrub makes it an epic fail.

Next up was when I painted our living room by myself.  Since I knew I didn't want the ProMar or to pay contractor pricing, I ended up going with the HGTV collection that SW sells for homeowners.
This paint is okay.  I wouldn't say it's epic fail category.  If you have a project and are a newbie painter I think this is fine.  My complaint is that I had to scrub some parts of the wall after it was painted (I was painting trim) and the paint came off like it was peeling plastic.  It's very rubbery and I felt like I had to use a ton of paint to get solid coverage on our textured walls.  Even the SW employee said it wasn't that great of a paint - thanks for the recommendation after I bought it!

Round two of painting our house through a contractor was about a year ago.  This guy was way more professional, super nice and continually reminded me he had been in Architectural Digest magazine.  That doesn't make me want to hire you more but good for you!  Anyway, his crew did a great job (we hired them a second time to paint out the rest of our house to list it) and the first thing I told him was that I do not believe in flat paint.  He quickly dismissed me saying that they use SW SuperPaint and it is indeed washable.  Skeptical but reminded of Architectural Digest magazine, wanting a flat finish and getting a ceiling thrown in for free, I agreed.  

SuperPaint by SW is amazing.  Seriously - it's totally amazing.  It has a great flat finish that isn't as chalky as ProMar AND it is washable.  When I had my foot surgery I couldn't get my foot wet for about 5 weeks so I had to splash around in the tub like a beached whale to take a bath.  I got paint on the walls one day and I was worried it stained - nope it dried perfectly with NO discoloration.  SOLD!  Wiping dog mud off the walls?  No rubbing off or discoloration!  SOLD!  This paint is amazing but it is pricey.  It retails for homeowners for about $55/gal so if you have a coupon or it's sale time, I would stock up.  We are members of the SW rewards club (or whatever it is) and we get 10% off purchases.  Next time you are in the mood to paint I highly suggest going with SuperPaint.  If I can ever get motivated to paint my entryway, I am buying SuperPaint!