Showing posts with label DIY. Show all posts

Friday, January 9, 2015

How to Paint Cheap Wood Paneling

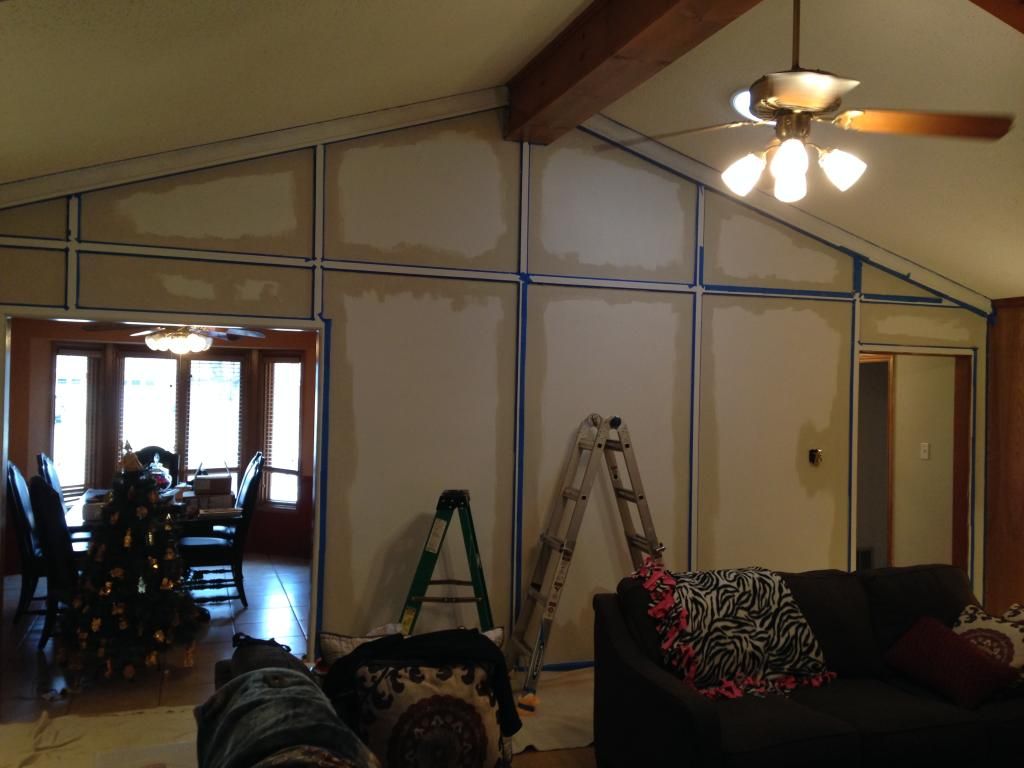
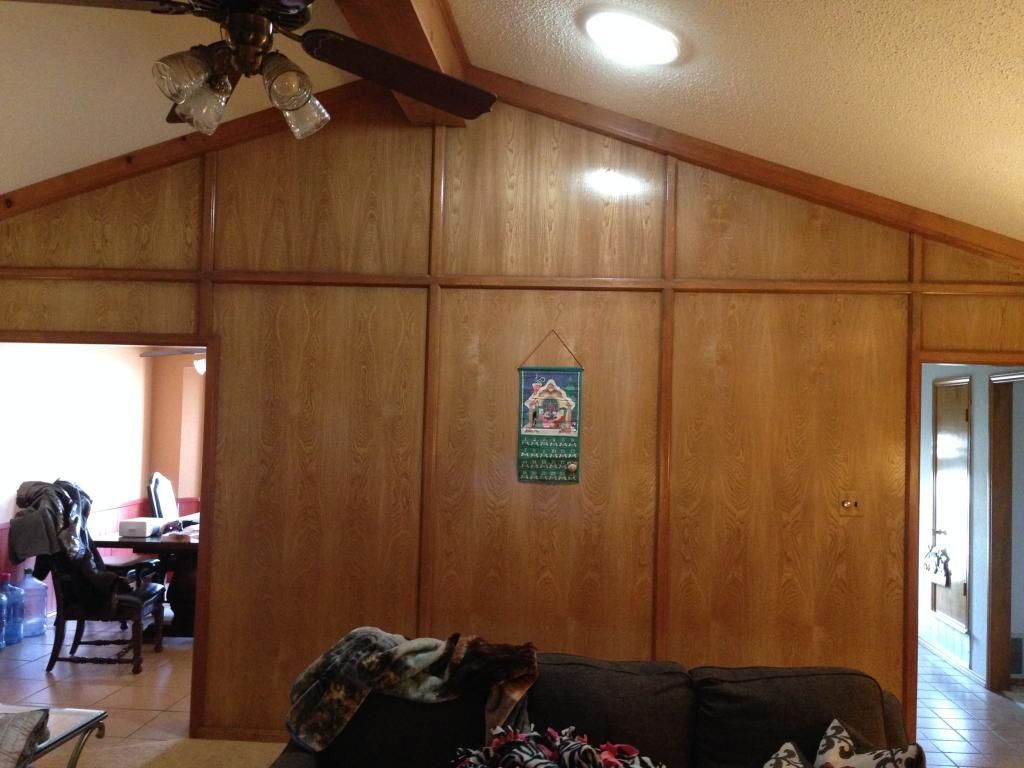
On Christmas day after we opened presents we were watching tv and M randomly decided we should start painting our living room.  I thought this was insane but we had a nice four day break ahead of us so why not try one wall?  Our living room is an internal room that is wall to wall wood paneling (the cheap particle board kind).  This is a phase 1 reno for us - it's a way to make the house look better in an affordable way until we can get a contractor in here.

This is the first time we have painted paneling so this was the method we used:
1) Degloss (we used Krud Kutter deglosser and it worked well with low odor)
2) Caulk/fill in nail holes
3) Two coats of primer (fill in nail holes we missed)
4) Two coats of wall color
5) Two coats of trim color

We use Sherwin Williams paints so we went with their multi purpose latex primer and did two thin coats of primer.  When the first coat of primer went on I started freaking out a little.  It looked like it wasn't sticking very well and the brush marks where we cut in looked terrible.  The second coat went on better but I think maybe for painting the doors I will try Glidden Gripper.  We used it on our media cabinet in our old house and while it was kind of tricky to work with, it stuck great on slick surfaces.

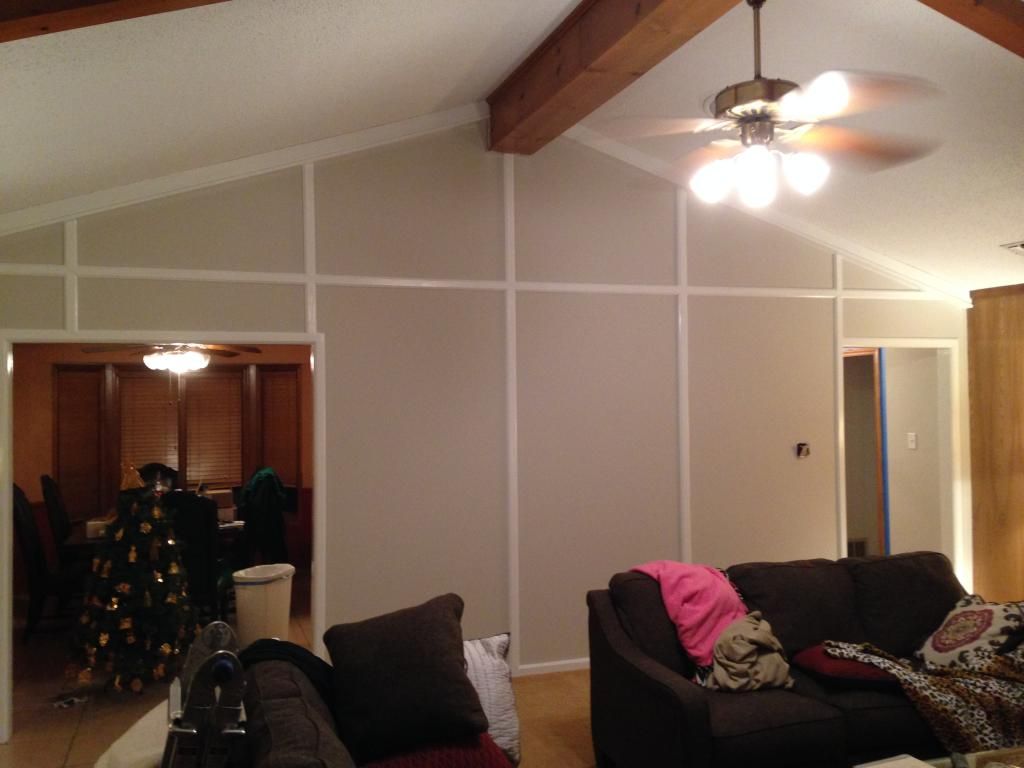
After two coats of primer the walls were starting to look better so onto the wall color.  Our favorite wall color is Sherwin Williams Agreeable Grey in Superpaint (flat finish) so we repeated that.  It is a light grey/beige color that changes with the light.  It's a bit of a colder color since it has grey as the base but in this room it is reading a little warmer.  Our trim color is just plain extra white in a gloss enamel finish.
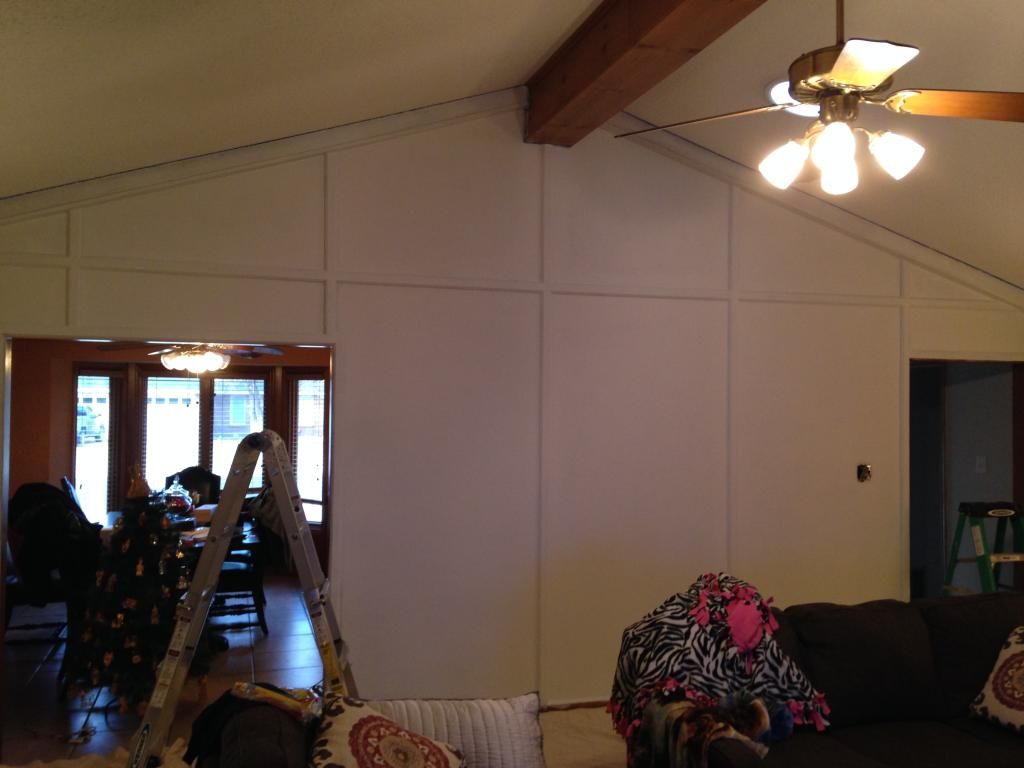
Two coats of primer
Wall color going on...
DONE!
We are still trying to finish the final wall and will this weekend.  We also need to do touch up on every wall but that will be the very last thing we do.  So far it looks awesome and is much more light and bright in here despite the fact that it is an internal room.  We do have one solar tube but it doesn't give off a ton of light.  I really like it!  

Here are some tips if you are thinking about taking the plunge and painting paneling.

1) Use flat paint.  Flat paint is the number one paint that is ideal for touch ups.  We have already had some scratches/marks and flat is far superior to blend in and cover mistakes.  We love Superpaint because it blends great and is also easy to wipe with a wet rag if it gets messy.  It doesn't rub off the walls.

2) Be liberal with your deglosser.  Make sure your rags are heavily saturated because it is the most effective way to treat the walls.  We didn't have to sand but some people might.

3) Enamel finish trim is challenging to work with.  It looks awesome but we have been having issues with it peeling up once we take off our protective blue paint.  We do two coats and we have been having trouble with it curing to the tape.  Have not found a solution yet.

Thursday, December 18, 2014

High Impact...Hidden in the Shadows

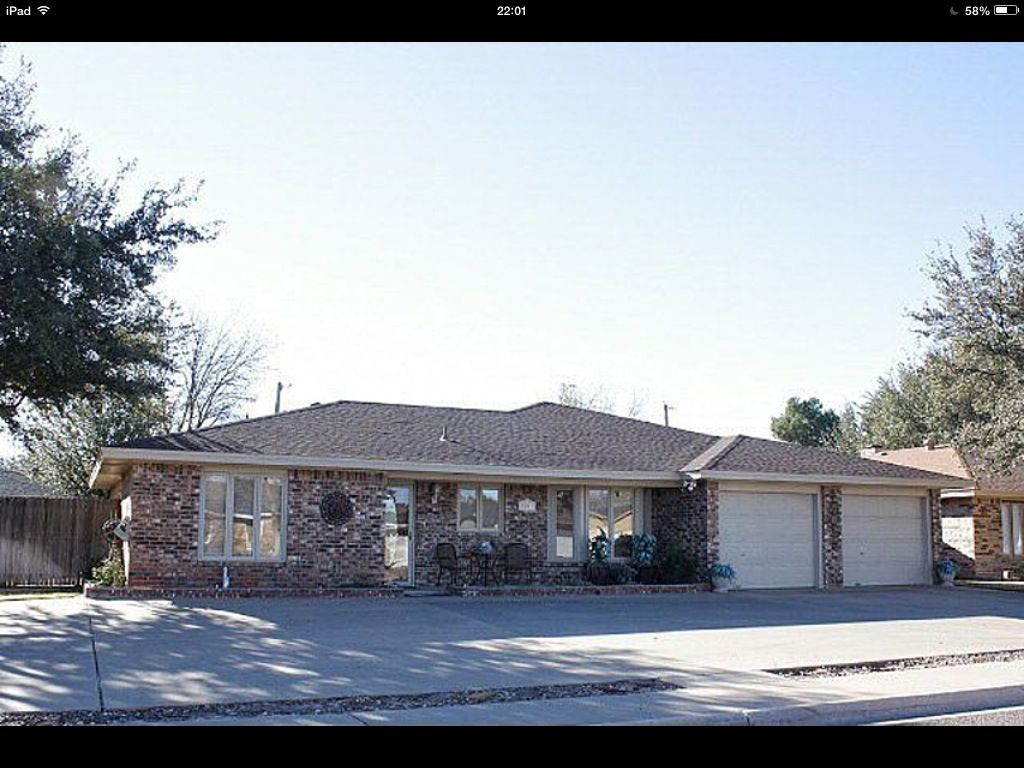
The front yard landscaping is the only project we have successfully completed in this house! The former owners pretty much phoned it in while they lived here and the front yard suffered like the rest of the house.  99% of our front yard is concrete.  We live on a street that starts to curve as you get to our house so we have our driveway and a second way onto our lot that makes it like a circle driveway.  It is ugly as can be but it has been great for extra parking and safety since our street can be dicey sometimes with people flying around the corner.


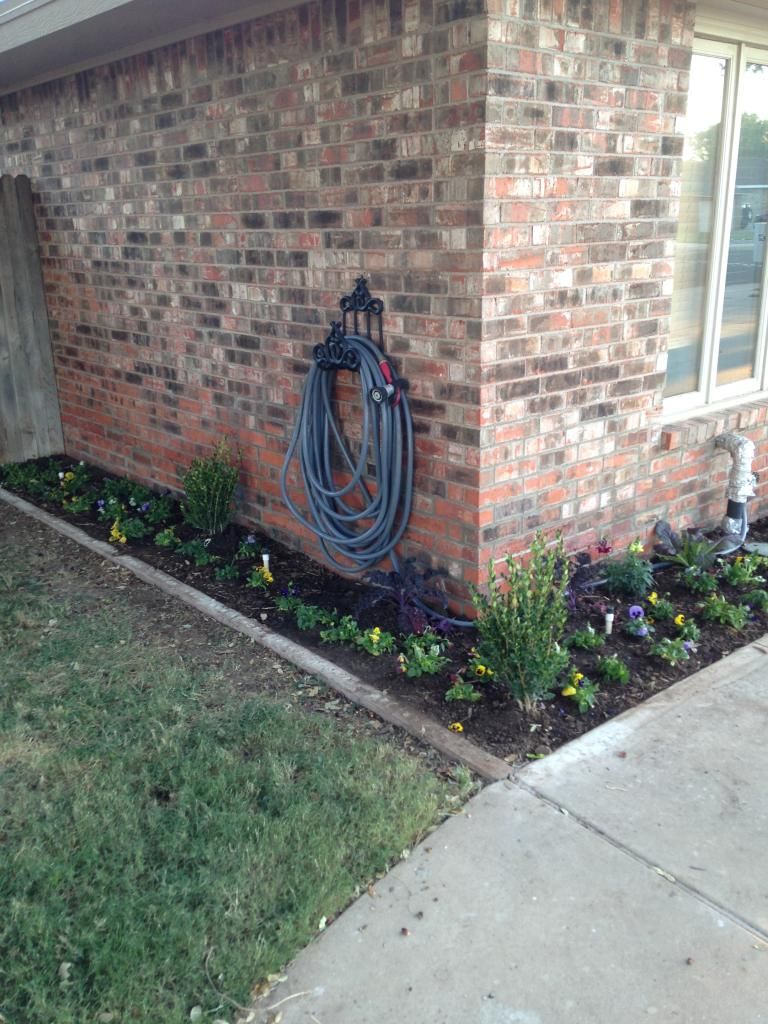
Unfortunately we don't have any full shots of the landscaping - I am going to make sure we have good "before" photos next project we start.  Everything in the beds was overgrown or dead so it looked like we were living it up with no HOA to hound us about aesthetics.  I cringed every time I drove up!  We were "those neighbors" that we hate living around.  In the summer the sun was beating down on the front of the house in the afternoon so we waited until October to plant some new landscaping.  We didn't want everything to incinerate in the heat.  Our house faces north/south and our last house did as well so we thought it would get some sun.


We tore out everything in the beds and scraped the soil/mulch (yay that was easy) and also were eyeing this random brick wall that was in front of the bed.  The bed is flush with the foundation and driveway and the way the bricks were laid, you could only plant large shrubs and no flowers because you wouldn't be able to see them.  After we ripped the plants out we were brainstorming about what to do and we noticed the bricks were wobbly.  I used my kung fu skills and kicked them...to our surprise, they fell right over.  HAPPY TIMES!  Whoever built that mess did NOT mortar them to the driveway so out they all came.  It was already looking better.  Again, no one will take bricks/rocks so while we step up the dumpster hunt, they are in M's old truck bed.  Once that was done we headed over to the nursery to make our vision of gorgeousness a reality.


We needed soil and plants so we selected our bounty and off to the register we went where we were punched in the face by the ridiculous price tag of the nursery items.  I like to support local businesses but we are on a budget since we have to renovate EVERYTHING on this house.  We will probably stick to a big box store next time - especially for soil.  When we were planting, there is a flood sprinkler system that is in the beds and I managed to hit a line so we had to replace a piece.  It is dead center where we wanted the plants and pretty shallow so it was tough navigating around it.

A few weeks later we noticed that the sun's new angle for winter/fall stops just short of hitting the front of our house with sun...so our plants have never seen the sun.  Surprisingly they haven't died but we did get a freeze and they were hurting.  Some never really bounced back 100% so I'm trying to watch the weather because they don't have the advantage of warming up with sunlight.  Lately it's been warmer and our pansies are flowering so for everything hiding in the shadows...it looks MUCH better!


Wednesday, December 17, 2014

Keep on a rockin me, baby!

Many people have heard the never ending story of the river rocks in our back yard.  I can't even begin to explain how back breaking this project has been.  There was a pond/fountain and in between that and our workshop, all the grass had been torn out and replaced with river rocks.  Midland is in the middle of West Texas and we are under water restrictions so a lot of people use these rocks to landscape.  It's not like I'm advocating everyone drain the water sources dry by not having any sort of xeriscape but do it so it looks nice!

Pond update here and here

So the rocks.  Midland has a citizen's collection center that is practically our second home but they do NOT take construction debris like bricks or rocks.  We were super lucky that one weekend the guy working there let us drop off two truckloads of rocks and he just kind of stirred them up into the ground.  We were able to scrape out almost all of the rocks that way and it was awesome.  But we still have more rocks and we need to tear out the fake gutters around the shed...but those are filled with rocks too.  We put a bunch of rocks into a big blue tub to try to get to a solid progress point and then the project died because you are not supposed to dump the rocks into the alley dumpsters either.  We also have rocks in the front yard that need to be torn out.  *sobs*  These rocks were turning into the bane of my existence.

The solution is to rent a dumpster.  The City has dumpsters for rent but I swear they only have two because every time I call they are unavailable.  They are first come, first serve so I'm pretty confident we will never be able to rent one.  Then I started looking into dumpster companies and WOW!  To rent a 10 cubic yard size one is a minimum of $400.  3 tons of debris weight is built into that cost but once you exceed that, it is another $65/ton of weight to dump

Honestly that one company I talked to was maybe $150 more than the City cost when you really think about everything but the husband was not pleased.  The part that killed me was even the dumpster people cringed when I said it was yard disposal like rocks.  EVERYONE HATES THESE ROCKS!    I feel like I'm going to end up being Tim Robbins in The Shawshank Redemption where he takes little handfuls of dirt out every day into the yard for his tunnel project.  I'll just start dropping handfuls of rocks into other yards of rocks when Sky goes for walks!  

The other issue is that there is not a facility where you can drop waste off and they charge you for weight.  Killeen had a dump where they weighed your vehicle on entrance and exit and that was awesome.  When I was renovating the rental to sell it, on my way back to DFW I had to stop by to drop off my trash since I couldn't leave my trash can out in the street for infinity.  

The plan right now is to call more dumpster rentals for price checks.  I really don't feel like spending $400+ to get rid of these rocks but at this point, our yard looks ridiculous and we need to finish so that when it's warm enough, we can lay sod and call a sprinkler company.  The "after" picture below isn't going to blow people away with it's beauty but considering the amount of back breaking labor we have done in the backyard, it has come a long way!


Tuesday, December 16, 2014

December Update: House Exterior Punch List

The husband and I used to really enjoy doing yard work so it seemed logical to dive into the thing we liked the most to get our feet wet on this house.  Given the sheer amount of holes/cracks/popcorn/paneling issues with the walls inside, painting seemed super overwhelming.  Every season I would plant almost 200 annuals in our flower beds, we were on top of mowing/weeds, I would trim our little oak tree like a boss....just generally we took pride in our house appearance.  We don't have an HOA in our neighborhood so maybe that's a lot of why we haven't tried enough...or it could be the rocks finally broke our spirit.

When we last left off on the pond adventure we had completely torn it out and filled the hole with 20 bags of soil.  Then we declared it too hot to do anything else and quit for about a month and a half.    Then one day it suddenly got a little cooler, we got some pep in our yard step and got the brilliant idea to keep going for about 3-4 more weekends.

Here's the running list of action items for the exterior:

Gutters on house and workshop
Tear out pond
Remove all the rocks - 60% complete
Remove fake gutters around workshop & fill in with soil - 33% complete
Tear our bricks in front yard plant beds
Landscape front beds
Trim oak tree in front yard
Tear out pond electrical
Tear out little tree next to pond electrical
Replace fence & bring one side towards street for more backyard
Tear out melon plants/lattice on side yard
Tear out lattice/vine plants in back yard
Lay sod on side yard & back yard
Run new sprinklers where pond was and tune up existing (too much overspray onto fence)
Paint front door
Power wash front porch
Replace numbers on house with something more modern
Replace front door light fixture with something more modern
Possibly tear out some concrete in front yard (long term)
Add some flair to house facade (long term)
Install horseshoe pits in backyard (this requires not being hermits)
Replace brown roof for "weathered wood" shingles (standard roof color - crossing fingers for hail - long term)

Looking at that list...it's a lot of projects.  Some are contractor jobs that we just haven't handled or it's the wrong season (laying sod).  Either way, the current state of the backyard is way better looking than it used to be.  My parents came up for Thanksgiving and we actually had a nice little spot to sit outside and get a fire going in our chiminea.  The front yard is also looking better but with a sea of concrete, it is really tough to have curb appeal.  I think we need some colorful ceramic planters by the front door and our roof line is also very flat which doesn't help with visual interest.

Stay tuned for an update on how the backyard is looking and why this blue tub of rocks is STILL in the way for four months and counting...


Monday, September 1, 2014

Paint Recommendations {Sherwin Williams}

Three years ago when we decided to start repainting our house we went to Sherwin Williams and bought a paint fan for $20.  If we kept the receipt and were done using it, the guy at the store said we could bring it back and get a partial refund.

When we bought our Little Elm house the paint colors were okay - they weren't necessarily our taste but it was move-in ready and that was what we were looking for.  Fast forward to moving in....and we notice all of these discolored spots everywhere with drips.  The owners decided to "help" by touching up the paint where they had nail holes.  They even went so far as to cut chunks of the drywall out behind the doors to try to color match the walls.  If we buy a house again that has move-in ready colors that we can live with for a little - we will write it into the contract that the seller is not to touch the walls - just take your things off the walls and leave them ALONE!  

We lived with it for a little while and finally found a painter to do the front half of our house.  He was nice enough but I would never use him again.  He recommended flat paint and we liked the idea of flat because the semi-gloss shine didn't need to be on all the walls in the house.  Aside from the crappy paint job he did, he picked SW colors and paint types.  Enter the ProMar series from Sherwin Williams.
This is hands down the crappiest paint I have ever paid for in my life.  We were sold on flat paint because it was "washable".  If any contractor comes to your house with ProMar cans - chase him away and tell him to buy something else!  Our second contractor showed up with this stuff after I specifically ordered something superior and he got an earful.  Here is why I don't like this paint and I would never recommend it.  ProMar 200 (or any ProMar series) is a contractor grade paint that is flat and goes on with a chalky-like feel to the touch.  It also is NOT washable.  We scratched the wall when a lamp fell over so I was trying to wipe the scratch with a damp cloth.  If the paint touches water it will discolor and rubbing it will cause the paint to rub off and expose whatever was underneath.  The only pro to this paint is that it does touch up fairly well (if you have a can still on hand) and feathers nicely but not having the ability to scrub makes it an epic fail.

Next up was when I painted our living room by myself.  Since I knew I didn't want the ProMar or to pay contractor pricing, I ended up going with the HGTV collection that SW sells for homeowners.
This paint is okay.  I wouldn't say it's epic fail category.  If you have a project and are a newbie painter I think this is fine.  My complaint is that I had to scrub some parts of the wall after it was painted (I was painting trim) and the paint came off like it was peeling plastic.  It's very rubbery and I felt like I had to use a ton of paint to get solid coverage on our textured walls.  Even the SW employee said it wasn't that great of a paint - thanks for the recommendation after I bought it!

Round two of painting our house through a contractor was about a year ago.  This guy was way more professional, super nice and continually reminded me he had been in Architectural Digest magazine.  That doesn't make me want to hire you more but good for you!  Anyway, his crew did a great job (we hired them a second time to paint out the rest of our house to list it) and the first thing I told him was that I do not believe in flat paint.  He quickly dismissed me saying that they use SW SuperPaint and it is indeed washable.  Skeptical but reminded of Architectural Digest magazine, wanting a flat finish and getting a ceiling thrown in for free, I agreed.  

SuperPaint by SW is amazing.  Seriously - it's totally amazing.  It has a great flat finish that isn't as chalky as ProMar AND it is washable.  When I had my foot surgery I couldn't get my foot wet for about 5 weeks so I had to splash around in the tub like a beached whale to take a bath.  I got paint on the walls one day and I was worried it stained - nope it dried perfectly with NO discoloration.  SOLD!  Wiping dog mud off the walls?  No rubbing off or discoloration!  SOLD!  This paint is amazing but it is pricey.  It retails for homeowners for about $55/gal so if you have a coupon or it's sale time, I would stock up.  We are members of the SW rewards club (or whatever it is) and we get 10% off purchases.  Next time you are in the mood to paint I highly suggest going with SuperPaint.  If I can ever get motivated to paint my entryway, I am buying SuperPaint!